Short answer
Start with the use of the pack, then test the packed sample
Identify whether the box is sales packaging, e-commerce packaging, transport packaging, or serves more than one function. Measure every item as actually packed, prototype the smallest workable construction, close the lid and side tucks, test protection, and record why any remaining space is needed. Do not call a box compliant from a photograph or a simple length × width × height calculation.
Which PPWR rule are you checking?
E-commerce, transport and grouped packaging: Article 24(1) sets a maximum 50% empty-space ratio from 1 January 2030 or three years after the relevant implementing act enters into force, whichever is later. The Commission is to establish the calculation methodology by 12 February 2028. Under Article 24(3), space filled with paper cuttings, air cushions, foam and similar fillers still counts as empty space. This is a future, category-specific rule, not a blanket 50% allowance for every gift box now.
Sales packaging: Article 24(4) requires the operator filling it to reduce empty space to the minimum needed for functionality, including protection, by 12 February 2028. It does not set a universal 50% threshold. Article 10 separately sets a 1 January 2030 packaging-minimisation design milestone for manufacturers or importers. The European Commission guidance explains the distinction. A mailer's regulatory category depends on its actual use, not its shape or the product photo alone; have the EU-side responsible party confirm the classification.
A workable sizing and approval sequence
- Record the packing configuration. List every product, card, wrap, insert and protective component per order. Note whether an additional shipping carton will be used.
- Measure the maximum occupied dimensions. Include a spiral binding, protruding cap, bundled accessory or raised component. Photograph the arranged set, not just each item separately.
- Choose a candidate inside size and construction. Ask the factory for the finished internal dimensions and dieline. Outside dimensions cannot tell you how much usable space is left inside.
- Pack and close a physical sample. Insert the full set, fold the lid and both side tucks, then reopen it. Look for forced closure, pressure marks, product movement and unused voids.
- Trial a smaller or simpler option. Compare another size or layout, and remove filler or redundant layers only if the contents still remain protected. A snug fit, insert or filler are alternative design choices, not interchangeable volume credits.
- Test the actual shipping route. Document handling or transit tests appropriate to the product and route. Protection is a legitimate reason for necessary space, but it should be evidenced rather than assumed.
- Keep a versioned record. Save product and box dimensions, material grade, packing photos, sample version, test results and the reason the chosen size could not be reduced further without losing function. Recheck if the assortment, box or packing method changes.
These are preparation steps, not a substitute for the final Article 24 methodology or a formal conformity assessment. Article 10 and Annex IV call for documented reasoning about minimum necessary weight and volume, including product protection and manufacturing and logistics needs. See the PPWR text.
Two real packing cases
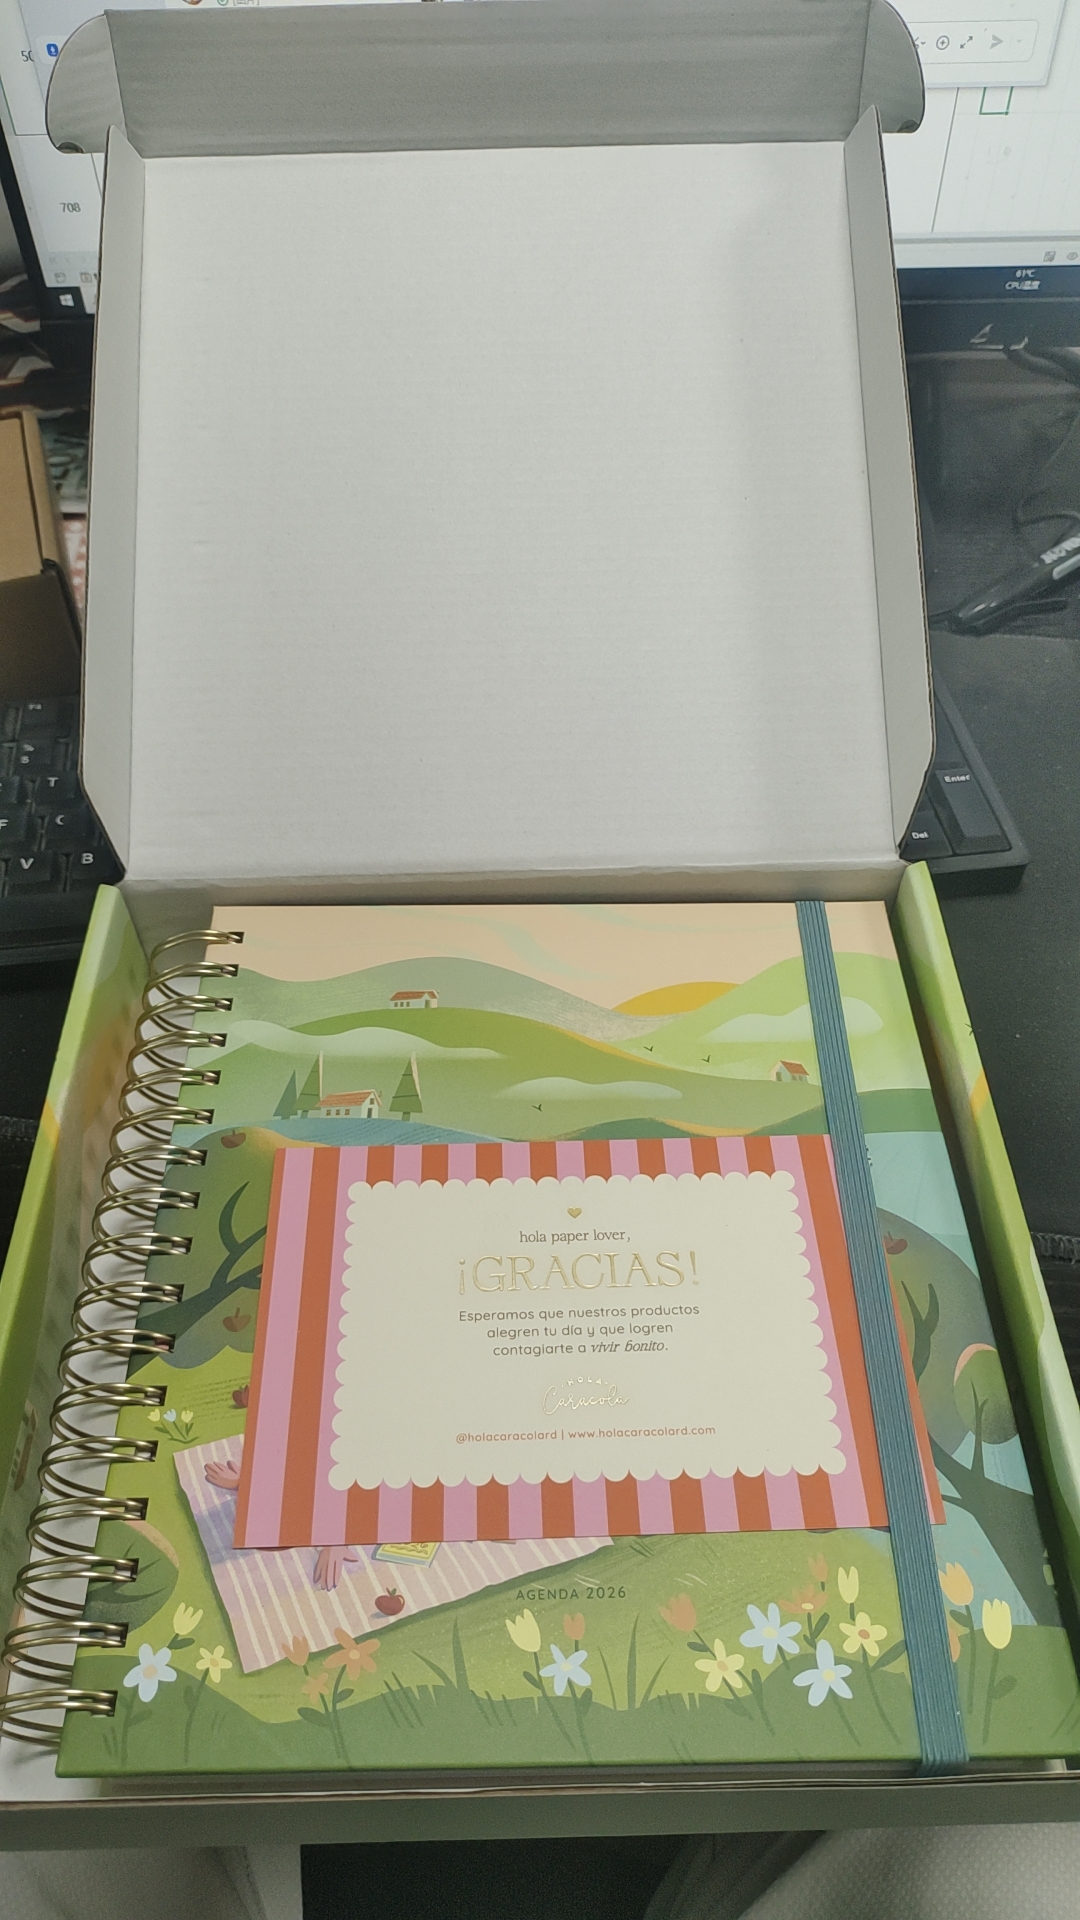
Spiral-bound notebook: the notebook was listed at 21.7 × 22.9 × 3.5 cm; the proposed mailer was 22.8 × 23.8 × 3.9 cm inside. The binding's highest point, not just the flat cover, must be checked. Even when the book sits in the open box, the lid's side tucks need room beside it. The stated measurements are project examples, not a standard clearance or a verified empty-space ratio.
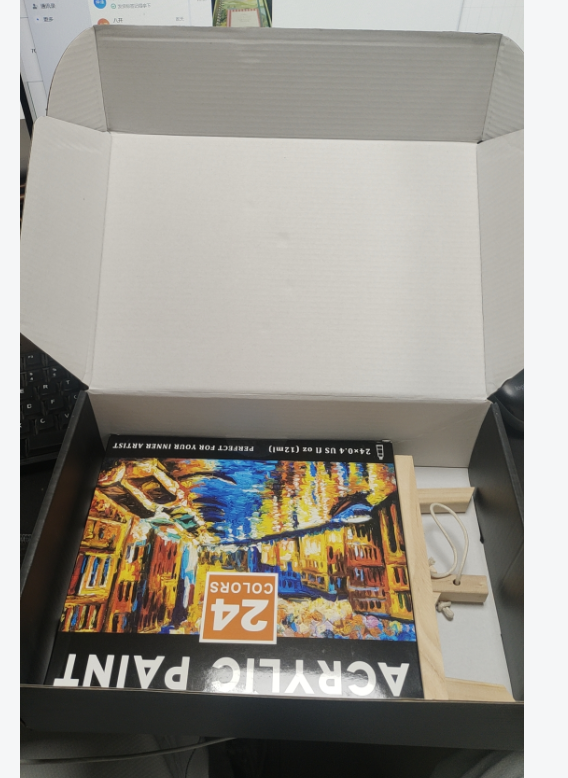
Multi-item painting set: its longest component measured 28.2 cm and the proposed box inside length was 29.2 cm. The arranged width was 20.2 cm against a proposed 20.7 cm inside width. The items themselves filled and stabilised the box, so no extra insert was needed in that project. The critical check was whether the lid's two side sections could tuck in without pressing against the set. We have no verified internal-height or regulatory volume calculation for this example, so it cannot demonstrate a PPWR ratio.
For more detailed fit measurements, see our two-case mailer sizing guide.
What should the buyer send to the box supplier?
Send the full product set and weight, maximum dimensions, packing-layout photos, destination, whether the box ships directly or inside another carton, and the protection issue you are solving. Ask for the proposed inside dimensions, material specification, sample and test plan. Keep photos of both the open and fully closed pack, plus the approved sample and any failed smaller trial. If you use loose paper filler, record why it was needed; it does not erase empty space for Article 24 purposes.
A four-heavy-metal pass report or an ink/coating supplier test addresses a different requirement. It cannot prove that the box is right-sized. See our PPWR buyer overview for how to read those documents.
Reviewed November 7, 2026 against Regulation (EU) 2025/40, especially Articles 10 and 24 and Annex IV, and the European Commission guidance. This article is a practical design workflow, not legal advice or a claim that the photographed packs satisfy the PPWR. Confirm the applicable category, dates and final method with your EU compliance adviser.