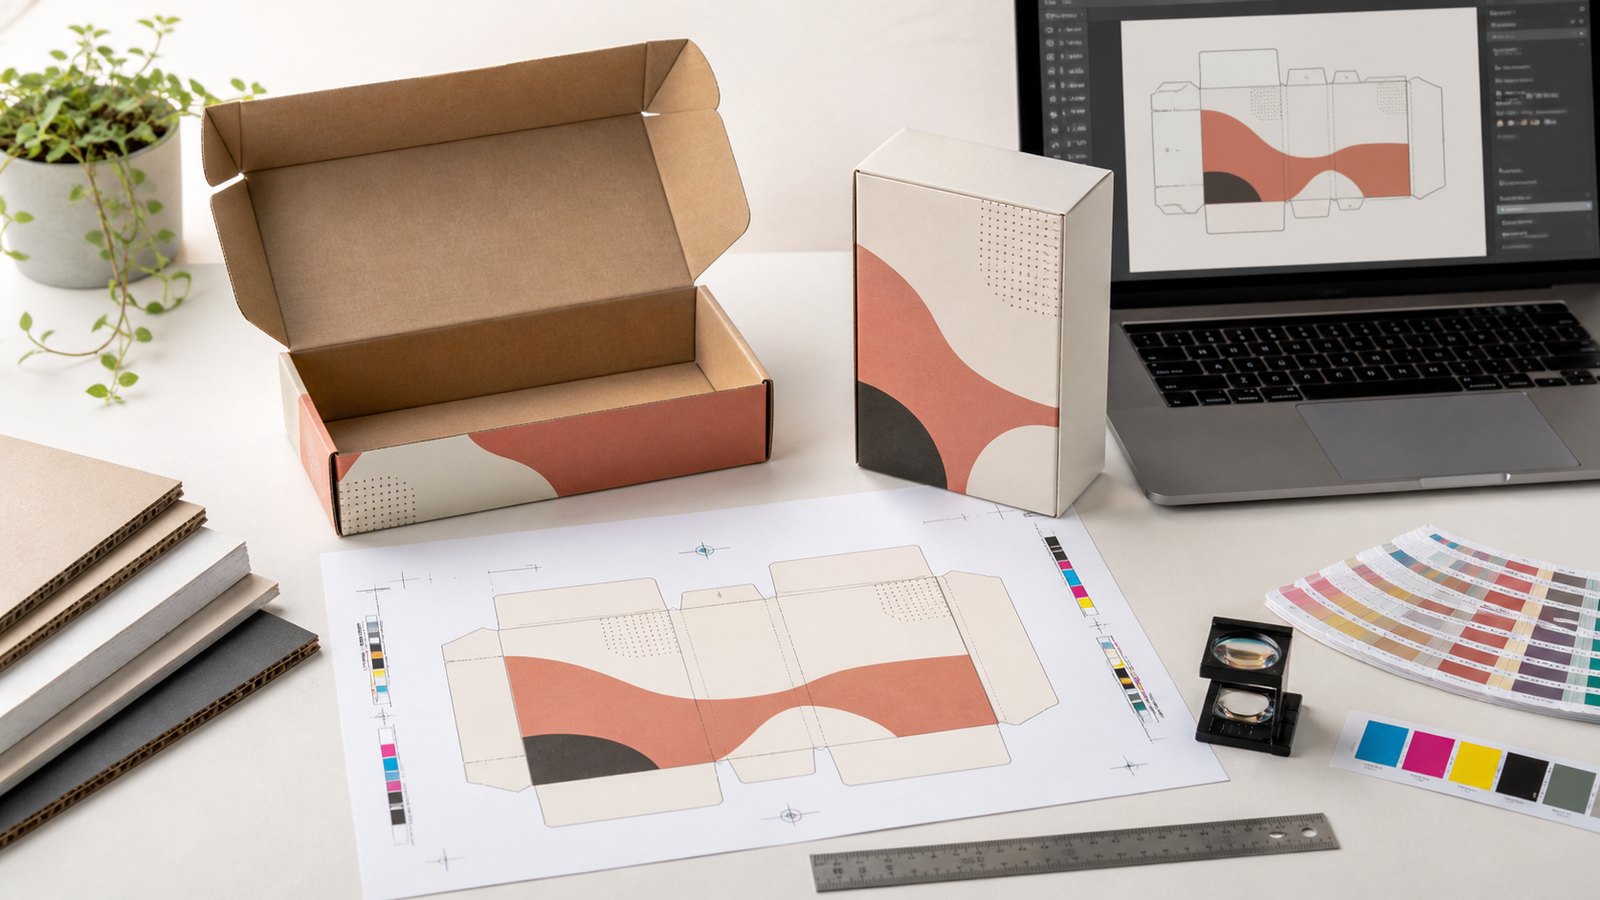
Short answer
What should you send for custom packaging production?
Send an editable vector source such as AI, editable PDF, or EPS when possible, plus a production PDF and a low-resolution visual mockup. Build the design on the supplier's confirmed dieline at full scale. Include the required bleed, keep critical content inside the safe area, outline or package fonts, embed or supply linked images, identify CMYK or spot colors, and place foil, spot UV, embossing, white ink, or special cuts on separate clearly named layers. JPG and PNG files are useful for references and can sometimes be printable at sufficient resolution, but they do not automatically provide editable vectors, dieline information, or production separations.
Papyrn packaging team experience
Many packaging inquiries arrive with a logo screenshot, a Canva link, a product photo, or a visual mockup. That is often enough to understand the brand direction and prepare an initial quote. It is not always enough to create a cutting form, separate print and finishing processes, or produce clear artwork at the final box size.
The opposite problem also occurs: a buyer sends an AI or PDF file and assumes the filename proves it is ready. The file may still use an old dieline, missing fonts, low-resolution linked images, RGB colors, no bleed, several conflicting versions, or finishing artwork mixed into the print layer. A useful prepress check looks inside the file and compares it with the confirmed product specification.
1. Which artwork file format should you use?
Use the format that preserves the information needed for the artwork. Vector files are valuable for logos, small text, line art, cut paths, and finishing masks because they can scale without pixelation. Raster files are appropriate for photographs and pixel-based artwork when their effective resolution is sufficient at final size.
Vector logos, text, shapes, dieline placement, and separate process layers
Include or outline fonts, embed or package linked images, and keep an editable master file.
A practical production handoff when vector objects, fonts, color information, and page scale are preserved
A PDF is not automatically print-ready. Check bleed, image resolution, layers, transparency, and whether the dieline remains separate.
Vector logos and simpler vector artwork
Complex transparency and effects may be flattened or interpreted differently. Keep the original source file too.
Scalable logos and simple web-to-print vector assets
Useful as a source asset, but the supplier may request AI, EPS, or a production PDF for the final packaging layout.
High-resolution photographic artwork and raster compositions
Confirm effective resolution at final size, color mode, layers, and linked fonts or objects. These files do not replace a packaging dieline.
Visual references, product photos, mockups, and sometimes suitable raster artwork when resolution is sufficient
Screenshots and small web images may look sharp on screen but become soft or pixelated at packaging size.
Early concepts and simple layouts
Exporting PDF Print can be a useful starting point, but packaging artwork still needs the supplier's dieline, correct scale, bleed, panel direction, and production checks.
Do not convert a small JPG logo into AI and expect new detail to appear. Placing or tracing a low-quality image inside a vector file does not restore the original curves, type, or resolution. Ask the designer for the original brand asset whenever possible.
2. The confirmed packaging dieline comes before final artwork
A packaging dieline is a flat production drawing showing the panels and structural guides used to make the finished item. It can include cut lines, creases, perforations, glue areas, locks, flaps, and non-printing notes. The exact structure changes with the size, material, board thickness, and manufacturing route.
Use the supplier's confirmed dieline
The dieline should match the approved inside size, material, board thickness, structure, and production method. A dieline found online or reused from another supplier may have different locks, glue areas, allowances, or panel dimensions.
Do not resize the dieline
Changing the scale to make artwork fit also changes the box. Place artwork on the dieline at 100% size unless the supplier gives different instructions.
Separate cut, crease, and artwork information
Cut lines, crease lines, perforations, glue areas, and non-printing notes should be identifiable and kept away from the final print artwork. The supplier may provide named spot colors or layers for these production guides.
Check panel direction on a folded sample
A flat screen view can hide upside-down side panels, reversed lid text, artwork crossing a lock, or a logo that disappears under a flap. Review a 3D mockup or physical white sample when orientation is not obvious.
Extend backgrounds beyond the trim
Artwork that touches an edge normally needs bleed so normal cutting variation does not reveal an unprinted line. The exact bleed and safety margin depend on the product and process, so use the supplier's value rather than one universal number.
Keep critical content inside the safe area
Logos, small text, QR codes, barcodes, and legal information should not sit directly on a cut, crease, corner, lock, or glue area. Ask the supplier to confirm the safe zone for the structure.
For an early quote, product dimensions and reference artwork may be enough. For final production, confirm the structure and dieline first. Papyrn's mailer box unfolded-size calculator is a planning tool for size and sheet class, not a production dieline.
3. Bleed, trim, safe area, and folds solve different risks
Bleed extends printed backgrounds beyond the final cut. Trim or cut lines show where the finished edge is intended. A safe area keeps important content away from normal cutting and folding variation. Crease lines show where the material folds, but the visible fold on thick board can occupy more space than a thin line on screen.
Adobe's print guidance explains that bleed allows artwork to extend beyond the page or trim boundary. Packaging adds structural variables, so the printer's dieline and instructions take priority. Ask for the required bleed, safe distance, minimum line size, and fold clearance for the actual product instead of copying one setting from a business card or another box.
Before placing artwork, confirm:
Final inside size + material + structure + dieline version + print side + bleed + safe area + finishing process
4. Fonts and linked images must travel with the file
If a font is unavailable when the file opens, software can substitute another typeface and change line breaks, spacing, or language characters. Outlining converts text into vector shapes and can prevent substitution, but it also makes normal text editing difficult. Keep an editable master, complete proofreading, then follow the supplier's request to outline or legally package the fonts.
Linked photographs, textures, logos, and illustrations can also disappear when only the layout file is sent. Adobe Illustrator's package feature gathers the document, linked graphics, and available fonts for handoff. Embedding images is another option, but the printer should still check effective resolution, color mode, transparency, and crop at final scale.
Do not judge resolution from how large the image looks on a laptop. Effective resolution changes when an image is enlarged in the layout. Send the original high-resolution image and let prepress evaluate it at the final printed size.
5. CMYK, spot colors, paper, and finish affect the printed result
RGB describes light on screens, while common packaging print workflows use process inks, spot inks, or digital device color management. Converting artwork can change bright screen colors. The substrate also matters: white card, coated paper, uncoated kraft, and corrugated materials do not produce the same visual result.
Suitable for photographs, gradients, and multicolor artwork
Screen RGB appearance is not a physical print proof. Paper color, flute, coating, lamination, ink limits, and process control affect the result.
Useful when a specific brand color or solid ink is important and the selected process supports it
A color code is a target, not a guarantee that every material and finish will look identical. Confirm the reference and sample method.
Creates a natural or colored base
The substrate changes printed color. Light colors may become muted, and some designs may need a white ink or white paper strategy depending on the process.
Text, line work, large dark areas, or barcode elements
Small black text and large rich-black areas can require different color builds. Ask the printer instead of choosing a formula copied from another project.
A monitor preview, brand hex code, and paper printout are not equivalent color proofs. When color is important, provide the approved brand reference and agree on the sample or proof method. Even then, acceptable production tolerance and the final material should be discussed rather than promising perfect screen-to-print identity.
6. Foil, spot UV, embossing, and white ink need separate artwork
Special finishing is not simply part of the CMYK picture. Production needs to identify the exact area, process, side, registration expectation, and material limitation. Use clear names and keep each process separate from the normal print artwork.
Separate vector shapes on a clearly named layer or spot color; indicate foil color and side
Separate vector mask showing the exact coated area; confirm whether it aligns with print or extends across folds
Separate vector artwork, direction, depth expectation, and the side from which the effect is viewed
Separate white-ink layer and confirmation of whether it is a base under color or a visible printed element
Separate cut path with dimensions, corner expectations, and any film or reinforcement requirement
Minimum text size, line thickness, gap, trapping, registration, and fold clearance depend on the process and equipment. Ask the supplier before reducing a foil logo, UV line, or embossed detail to a size that may not reproduce consistently.
7. QR codes and barcodes require physical-use checks
Supply QR codes and barcodes as suitable vector or high-quality artwork when possible. Keep them away from creases, curved corners, locks, glue areas, heavy texture, reflective foil, and low-contrast backgrounds. Preserve the required clear area and do not stretch the symbol.
Barcode type, encoded data, size, magnification, quiet zone, color, and print quality may be governed by the retailer, marketplace, carrier, or GS1 standard used by the project. A code that scans from a screen mockup is not proof that it will scan after printing, lamination, folding, or warehouse handling. Test the intended printed sample with the relevant devices and workflow before mass production.
8. A practical artwork workflow for small ecommerce brands
Small brands do not need a complete production file before asking for help. Separate the planning stage from the final artwork stage so design time is not spent on an unconfirmed box size or structure.
Share the product size, weight, photos, quantity, selling channel, and protection needs. Select the box structure before building final artwork.
Confirm inside dimensions, paper or corrugated construction, printing side, and finish. Board thickness can affect structural allowances.
Use the current supplier dieline for the confirmed specification. Do not assume a previous or downloaded template is interchangeable.
Add bleed, protect the safe area, confirm panel orientation, and place finishing masks on separate layers.
Send the production PDF plus editable source, fonts or outlined text, linked images, color references, and a visual mockup.
Check spelling, versions, colors, barcodes, QR codes, panel direction, dimensions, print sides, and finishes. Do not approve only from a small phone preview.
Use a white sample for structure and fit, a digital printed sample for general artwork placement, or a production-method sample when exact material, color, and finish behavior matters.
9. Custom packaging artwork handoff checklist
Use this checklist for mailer boxes, paperboard cartons, printed tissue paper, cards, stickers, and labels, then adjust it to the supplier's product-specific instructions.
Files and confirmations to send
- Confirmed box style, inside dimensions, material, and dieline version
- Artwork at 100% scale with the required bleed and safe area
- Editable AI, EPS, or source file plus a production PDF
- Fonts outlined or legally packaged, with an editable master retained
- Linked images embedded or included and checked at final effective size
- CMYK or approved spot-color references identified consistently
- Separate layers or spot colors for cut, crease, white ink, foil, UV, embossing, and windows
- Front, back, top, bottom, inside, and opening direction clearly identified
- QR codes and barcodes supplied as suitable artwork and tested at intended size
- Low-resolution visual mockup showing the intended folded result
- One final version name and written list of changes to avoid file confusion
10. Common artwork problems that delay a custom packaging order
- Sending only a screenshot of a logo or Canva design.
- Designing before the box size, structure, or material is confirmed.
- Moving or scaling the dieline to fit the artwork.
- Keeping backgrounds exactly on the trim line with no confirmed bleed.
- Placing small text or QR codes across creases, locks, or glue areas.
- Leaving missing fonts or external image links in the file.
- Using RGB screen colors as the only color reference.
- Putting foil, UV, embossing, and print artwork on one unclear layer.
- Sending several files called final without identifying the approved version.
- Approving a flat PDF without checking the folded panel direction.
A prepress correction is not automatically included in the original packaging price. Simple placement checks may be part of normal file review, while logo rebuilding, retouching, language changes, dieline redesign, version creation, and extensive production artwork can require separate design work and approval.
11. External references for artwork preparation
Use software documentation to prepare and package files, then follow the packaging supplier's current dieline and process instructions. For barcodes, use the standard and marketplace requirements that apply to the actual product and destination.
Reviewed by Papyrn packaging team. Updated August 24, 2026. This guide provides artwork-planning information, not a universal print specification or color guarantee. Final file format, dieline, bleed, safe area, resolution, color setup, finishing masks, barcode requirements, proof method, and production tolerance depend on the confirmed packaging product, material, printing process, finishing, equipment, and destination requirements.
FAQ
Custom packaging artwork questions
What file format is best for custom packaging artwork?
AI, editable PDF, and EPS are commonly useful because they can preserve vector logos, text, paths, colors, and dieline placement. The format alone does not make a file print-ready. The supplier still needs to check scale, bleed, fonts, linked images, color setup, dieline layers, and finishing masks.
Can a JPG or PNG be printed on a custom box?
Sometimes. A high-resolution raster image can be suitable for photographic or other raster artwork at its final effective size. A small web image, screenshot, or low-resolution logo may become pixelated and is difficult to edit, separate, or align. Send the original file for checking rather than enlarging it yourself.
Can I use Canva to design custom packaging?
Canva can help create a concept or simple artwork, and a PDF Print export may provide useful source material. Final packaging still needs the confirmed production dieline, full-scale placement, bleed, panel orientation, color checks, and separate finishing information. Ask the supplier to preflight the export before approving production.
How much bleed should packaging artwork have?
Use the value provided with the supplier's dieline. Bleed and safe-area needs vary by packaging product, material, cutting method, print process, and finishing. Do not assume one measurement applies to every box, card, sticker, or tissue-paper project.
Should fonts be outlined before sending artwork?
Outlining can prevent missing-font substitution, but outlined text is no longer easily editable. Keep an editable master, check spelling first, and either outline fonts or package them legally according to the supplier's handoff request.
Does approving a PDF guarantee the printed color?
No. A PDF can show layout and color values, but monitors, paper color, board construction, ink, coating, lamination, and production method affect physical appearance. Use agreed color references and an appropriate printed sample when color is important.